In a previous post, we explored the Windows 10 privacy settings in depth, and a recurring theme that most users are uncomfortable with is telemetry. Microsoft’s new OS collects all kinds of information on how you use the system, which apps you have installed and more.
Windows Home and Pro users have little choice in handling even diagnostic and usage data as you are forced to send at least some basic data over to Microsoft. Only Enterprise users can completely disable data collection on the spot but if you are willing to put in the effort, you can do it in any Windows edition.
Before you attempt any of the steps mentioned in this guide, make sure to create a system restore point. Since these services are integrated deep into Windows 10, they might affect some part of your system. All changes mentioned in this post can be reverted but you should still make sure that nothing will go wrong with your system. Finally, if you do not want to do all this by yourself, visit the link above and download one of the apps mentioned in the post so that you can disable the telemetry settings from there.
Start with the Registry
1. Open the Registry Editor by typing regedit.exe in your Start menu and selecting the first result.
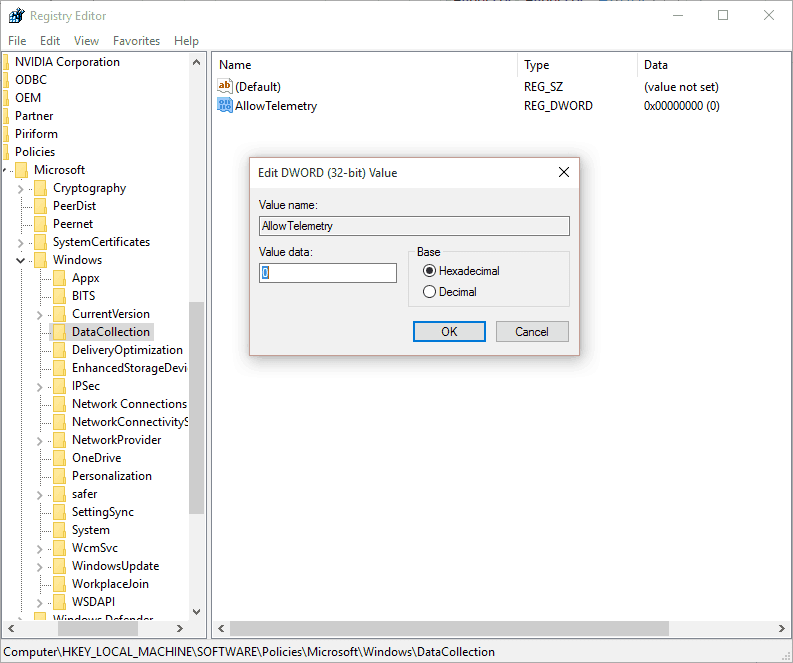
2. Go to HKEY_LOCAL_MACHINE\SOFTWARE\Policies\Microsoft\Windows\DataCollection. As always, create any keys that do not already exist.
3. Right click on the right side pane and select a new DWORD (32-bit) named AllowTelemetry.

4. Double click on the DWORD and change its value to 0.
This option should force the system to disable telemetry but since Microsoft does not actually allow this in Home and Pro editions of Windows 10 you will also have to disable certain Windows service to seal the deal.
Disablethe offending services
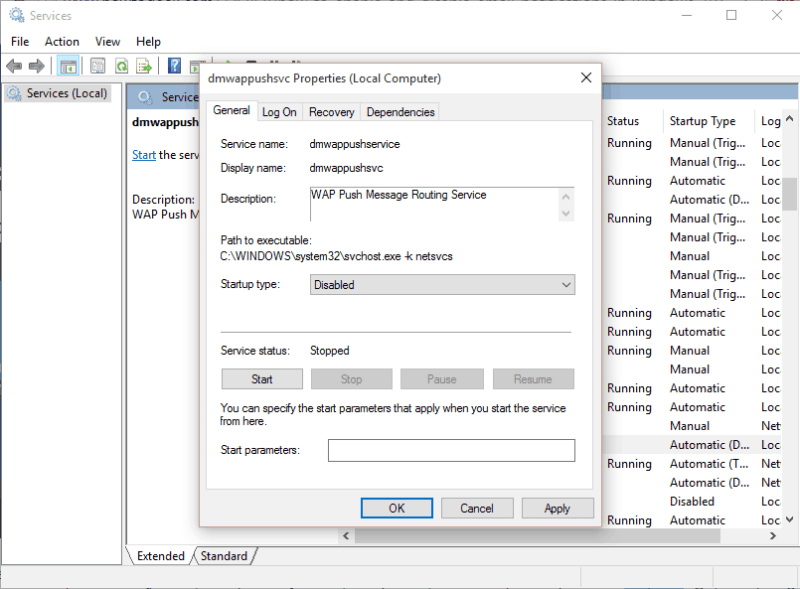
1. Open the Services menu. The easiest way is to type services.msc in your Start menu and hit the Enter key.
2. You will need to find these two services:
-Diagnostics Tracking Service
-dmwappushsvc
3. Open both services, one at a time, and select the “Disabled” option from the dropdown Startup type menu. Make sure that you click on OK before closing the windows in order to save the settings.

4. Once you have made the change in both services, restart your computer to apply everything.


