Just like taking screenshots of open windows or applications has become a necessity, recording videos of your computer screen comes at a close second.
How to record a video of your Chrome browser
Since Google’s browser is still the most popular one, you might need to record a video of your Chrome browser in which case you have several options to try.
Game Bar – Windows
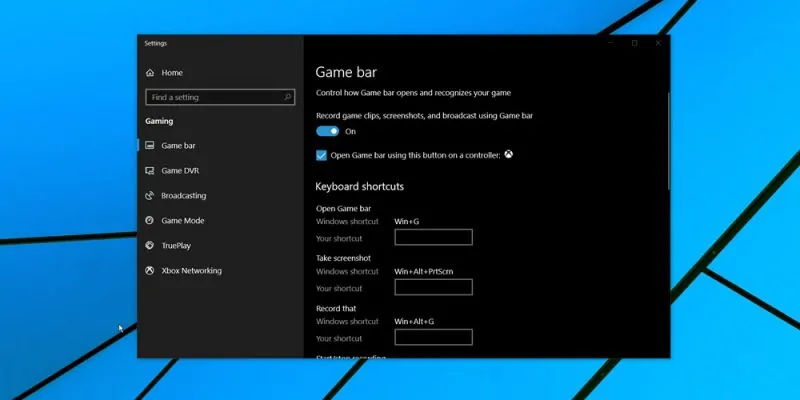
The Game Bar in Windows 10 was designed to allow users to record PC games but the good news is it works in any app.
To begin with, check if it’s enabled by searching for “game bar” in the Start menu. Click the result from System Settings.
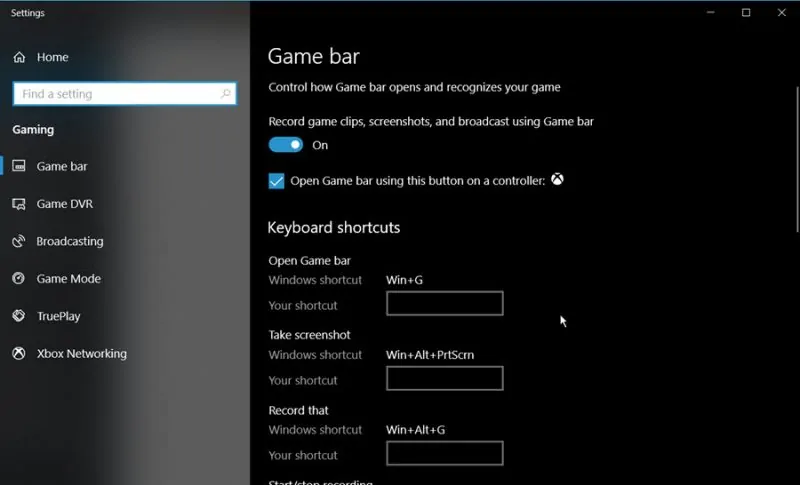
On the Settings page make sure the toggle under the option called “Record game clips, screenshots, and broadcast using Game bar” is on.
Now you can open Google Chrome or another app you want to record and press Windows + G to open the Game Bar. The menu will open as a transparent overlay. Press the “Record from now” button or use the keyboard shortcut Windows + Alt + R to start recording in Chrome.
Don’t miss: Run Android apps in Google Chrome
The default output folder where you’ll find your recording is called “Captures” and is located in the system Videos folder.
Screenshot tool – Mac OS
To open the screenshot tool press Command+Shift+5. Then, simply select the app or screen area you want to record and click the option called “Record Selected Portion” from the menu to start recording.
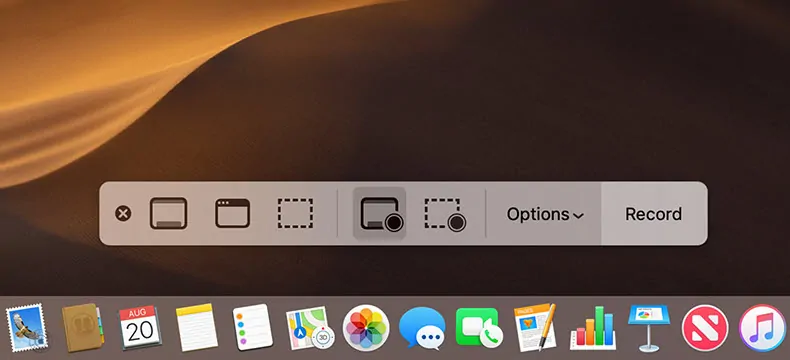
If you’re a Mac user you’ll find it very easy to record a video of your Chrome browser. MacOS includes a screenshot tool that also provides options to record videos which work in all web browsers and applications you have installed.
To stop the recording open the menu once more using the Command+Shift+5 keyboard shortcut and click the “Stop Recording” button. You’ll find the video saved to your desktop in a new folder called “Movies”.
Loom – Chrome extension
Chrome extensions can quickly pile up and some of them can pose security risks. Nevertheless, some are safe and extremely useful such as Loom. If you need to record videos in Chrome often this is one extension you should definitely give a try.
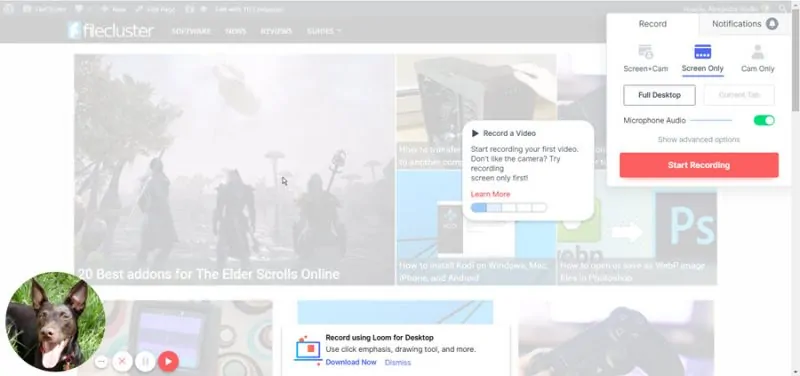
The extension will add itself in the Chrome toolbar and you’ll need to click its icon to open the recording window. There, you will find an option to record videos using your webcam and microphone but also one to record in Chrome. Simply click “Start Recording” when you’re ready and stop the recording by clicking the green bottom in the bottom left.
When the recording process is finished, the video will be automatically uploaded to Loom’s hosting service and a link will be generated which you can share with others.
OBS – Third-party app
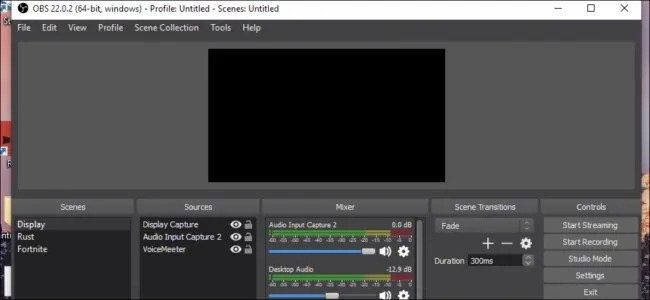
Open Broadcaster Software is a more feature-rich option for video recording in Google Chrome and in other apps as well. This application works on all major platforms, specifically Windows, Linux, and Mac OS.
OBS has a wealth of features including the ability to use multiple “Scenes” each with different settings which can certainly come in handy while live streaming. Each “Scene” lets you set up the sources for capturing audio and video.
Don’t miss: Disable website “Show notifications” requests in Chrome
The app’s default behavior is to use your default microphone and capture the display but there is also the option to add new sources from the window’s right-click menu.
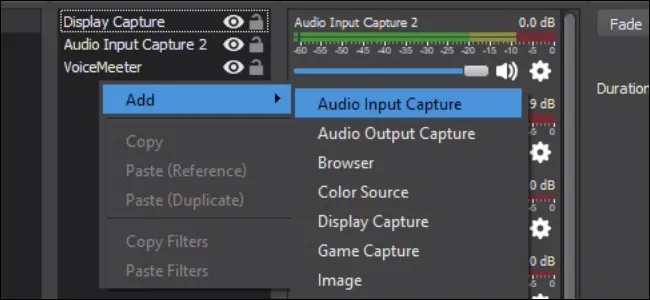
You can hit the “Start Recording” button after you finish configuring OBS. The “Stop Recording” button can be used to end the recording process.
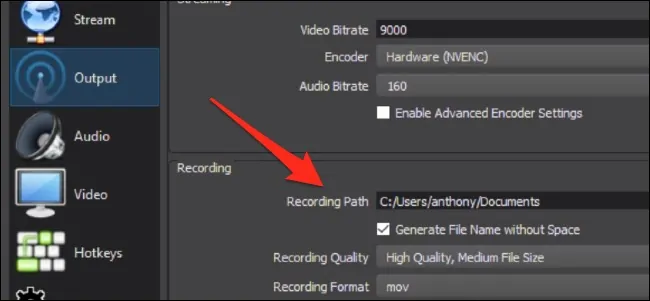
In the Output section of the program’s Settings you will find the default location where OBS saves the recordings to. It’s also worth mentioning that from the Settings you can also change the framerate and resolution for your recording.

